
How to Make a Glory Hole: Real DIY Methods, Practical Tradeoffs, and Smarter Alternatives
People searching for “how to make a glory hole” are usually looking for real, practical information — not jokes, not theory, and not vague ideas. This guide explains the common DIY methods people actually use, what works, what fails, and what most people end up doing instead. (Spoiler: most DIY attempts end in frustration.. but we’ll get to that.)
An elongated oval is less common in DIY setups, but there’s a practical reason manufacturers use this shape. A round hole only works at one height (ask us how we know) — which means the setup is basically custom-built for a single person. An oval that spans several inches vertically accommodates different heights without needing any adjustment. That’s why most commercially made panels use this approach rather than a simple circle.
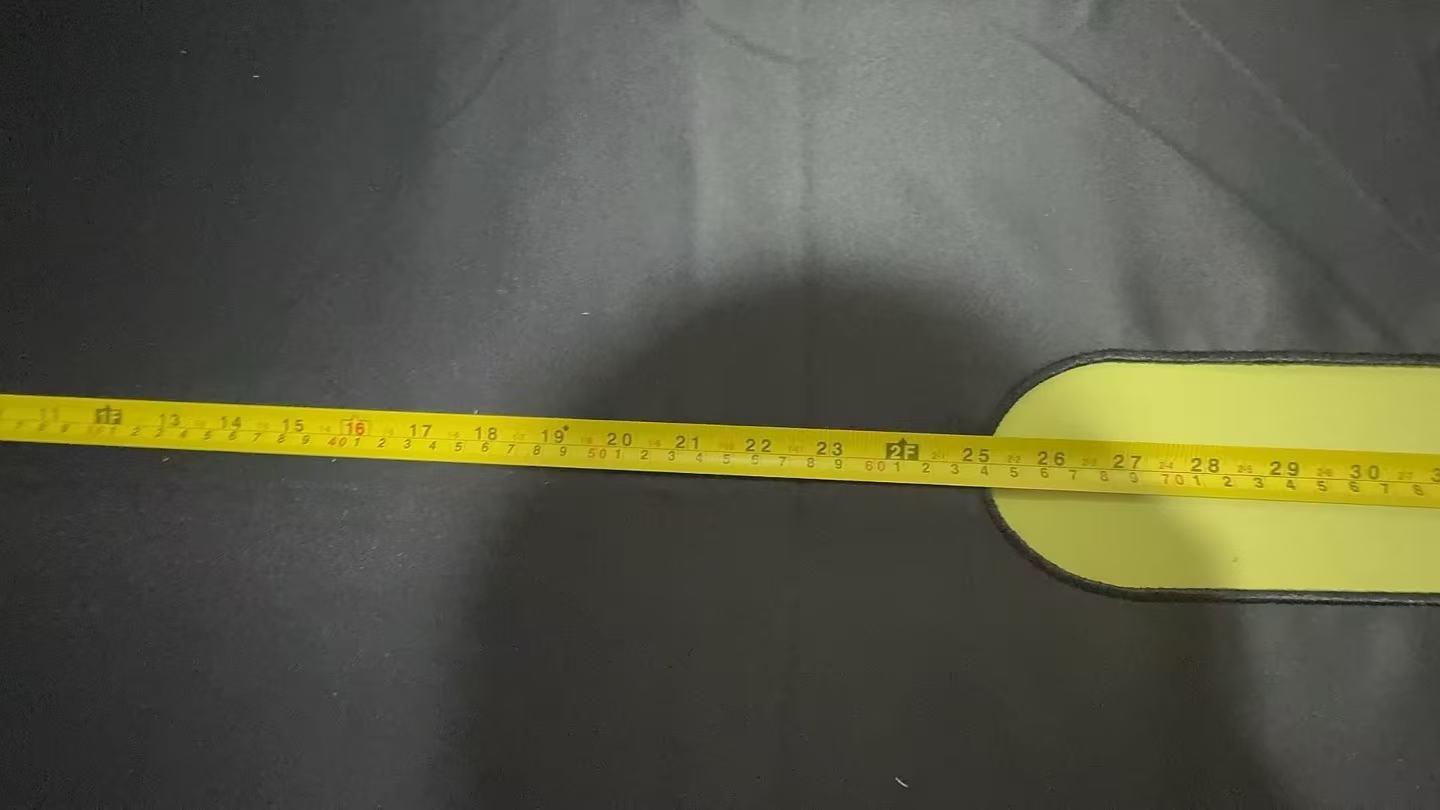
Measuring out the width of the oval opening — getting these proportions right makes a real difference in usability.
If you prefer ready-made stuff, check out our portable gloryhole options here.
Common DIY Glory Hole Methods People Use
When people talk about DIY glory holes, they’re usually not talking about cutting holes in walls. We’ve seen some real horror stories tbh. Most real-world setups are fabric-based, because fabric is portable, easy to work with, and doesn’t permanently damage anything.
There are three setups people keep coming back to.
Standalone Fabric Structures
This is the most straightforward DIY approach.
People use a simple freestanding structure — usually a lightweight frame — and attach fabric to it. The fabric is stretched or clipped across the frame, with an opening reinforced in the middle.
Why people go this route:
- it doesn’t rely on doors or walls
- it can be set up almost anywhere
- it breaks down for storage
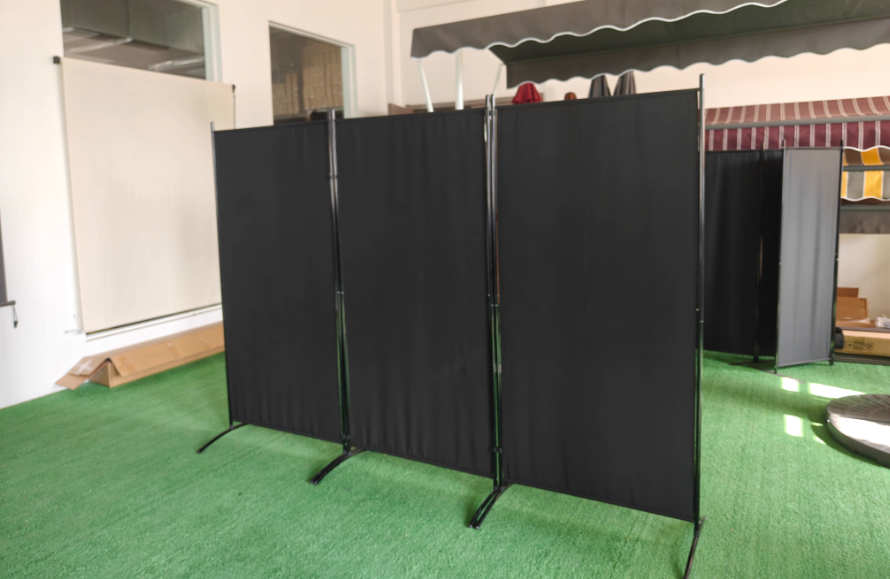
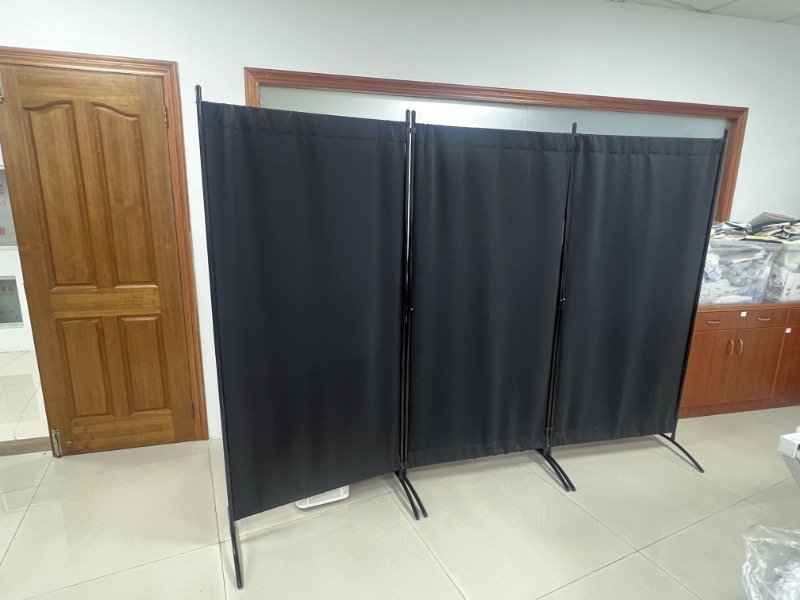
A homemade three-panel fabric divider — simple frame, fabric stretched across, opening in the center panel.
The downside is stability — and trust me, you don’t wanna find that out mid-session. If the frame isn’t solid or the fabric isn’t tensioned well, things can shift, sag, or feel flimsy once there’s movement involved. And yeah.. that’s about as awkward as it sounds.
Doorway Mounts Using Tension Rods
This is probably the most common “clever” DIY solution.
People use pressure-mounted tension rods inside a doorway and hang fabric between them. The door frame becomes the structure, and the rods hold everything in place without drilling or screws.
Why this setup is popular:
- fast to set up
- no permanent damage
- feels stable when the doorway is solid
Door frames vary, tension rods can slip, and you’re locked into the size and position of the doorway. It works, but it isn’t very flexible.
We built a version with adjustable tension rods and no-slip pads to solve these issues. You can check it out here.

Booth-Style Setups
Booth-style setups are the most involved DIY option.
These work like a changing room or dressing booth, where the entire structure is enclosed. Fabric panels surround a frame on multiple sides, creating separation and maximum anonymity.
Why people choose booth setups:
- privacy is much higher
- the structure doesn’t rely on walls or doors
- everything feels more controlled and intentional
The tradeoff is portability. Booths are bulkier, heavier, and harder to carry or store. They’re the strongest portable option, but also the least convenient to move around.
Here’s a quick video showing how a doorway-mounted setup actually works in practice:
After trying (and failing at) these setups, most people end up switching to something purpose-built. Some recommended portable glory hole versions can be found here.
Wooden Panel Setups
Some people prefer a more rigid DIY option and go with a removable wooden panel instead of fabric.
This usually involves cutting a hole into a plywood or MDF panel and positioning it inside a doorway, frame, or temporary support structure. The panel provides a firm surface and doesn’t flex like fabric.
Why people choose wooden panels:
- more rigid and stable
- the opening holds its shape
- feels more “solid” than fabric
The tradeoffs are weight and handling. Wooden panels are heavier, harder to store, and easier to damage floors or door frames if not padded properly. Edges also need to be finished carefully to avoid discomfort or injury.
What Usually Goes Wrong With DIY Glory Holes
Most DIY glory hole setups fail for boring, practical reasons. And not because the idea is bad, but because the details get underestimated.
These are the problems people run into over and over again.
- Stability issues — fabric sags, rods slip, frames wobble, and movement kills the experience.
- Poor hole placement — the height or size is off, and the whole setup becomes awkward fast.
- Reinforcement problems — fabric tears, wood chips, and edges become rough over time.
- Cleanup friction — DIY materials rarely hold up well after repeated cleaning.
- Noise and privacy issues — thin materials don’t block sound and loose frames creak.
- Storage problems — anything annoying to set up or put away eventually stops getting used.
Stability Issues
The biggest issue is movement.
Fabric setups can sag or shift. Tension rods can slip. Frames that seemed solid at first start wobbling once there’s real pressure or motion.
Even small movement breaks the experience and forces constant adjustment, which gets old fast.
Poor Hole Placement
This is one of the most common mistakes.
Once a hole is cut, its position and size are locked in. If the height is off or the opening is too small, the entire setup quickly becomes awkward or uncomfortable.
Sharp Edges and Reinforcement Problems
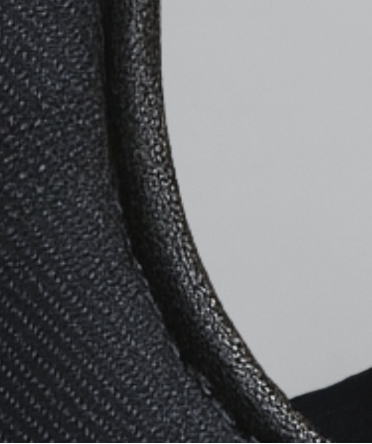
Openings need reinforcement. Without it, fabric tears and wooden panels chip. Finished designs reinforce the opening itself so it keeps its shape and stays comfortable over repeated use.
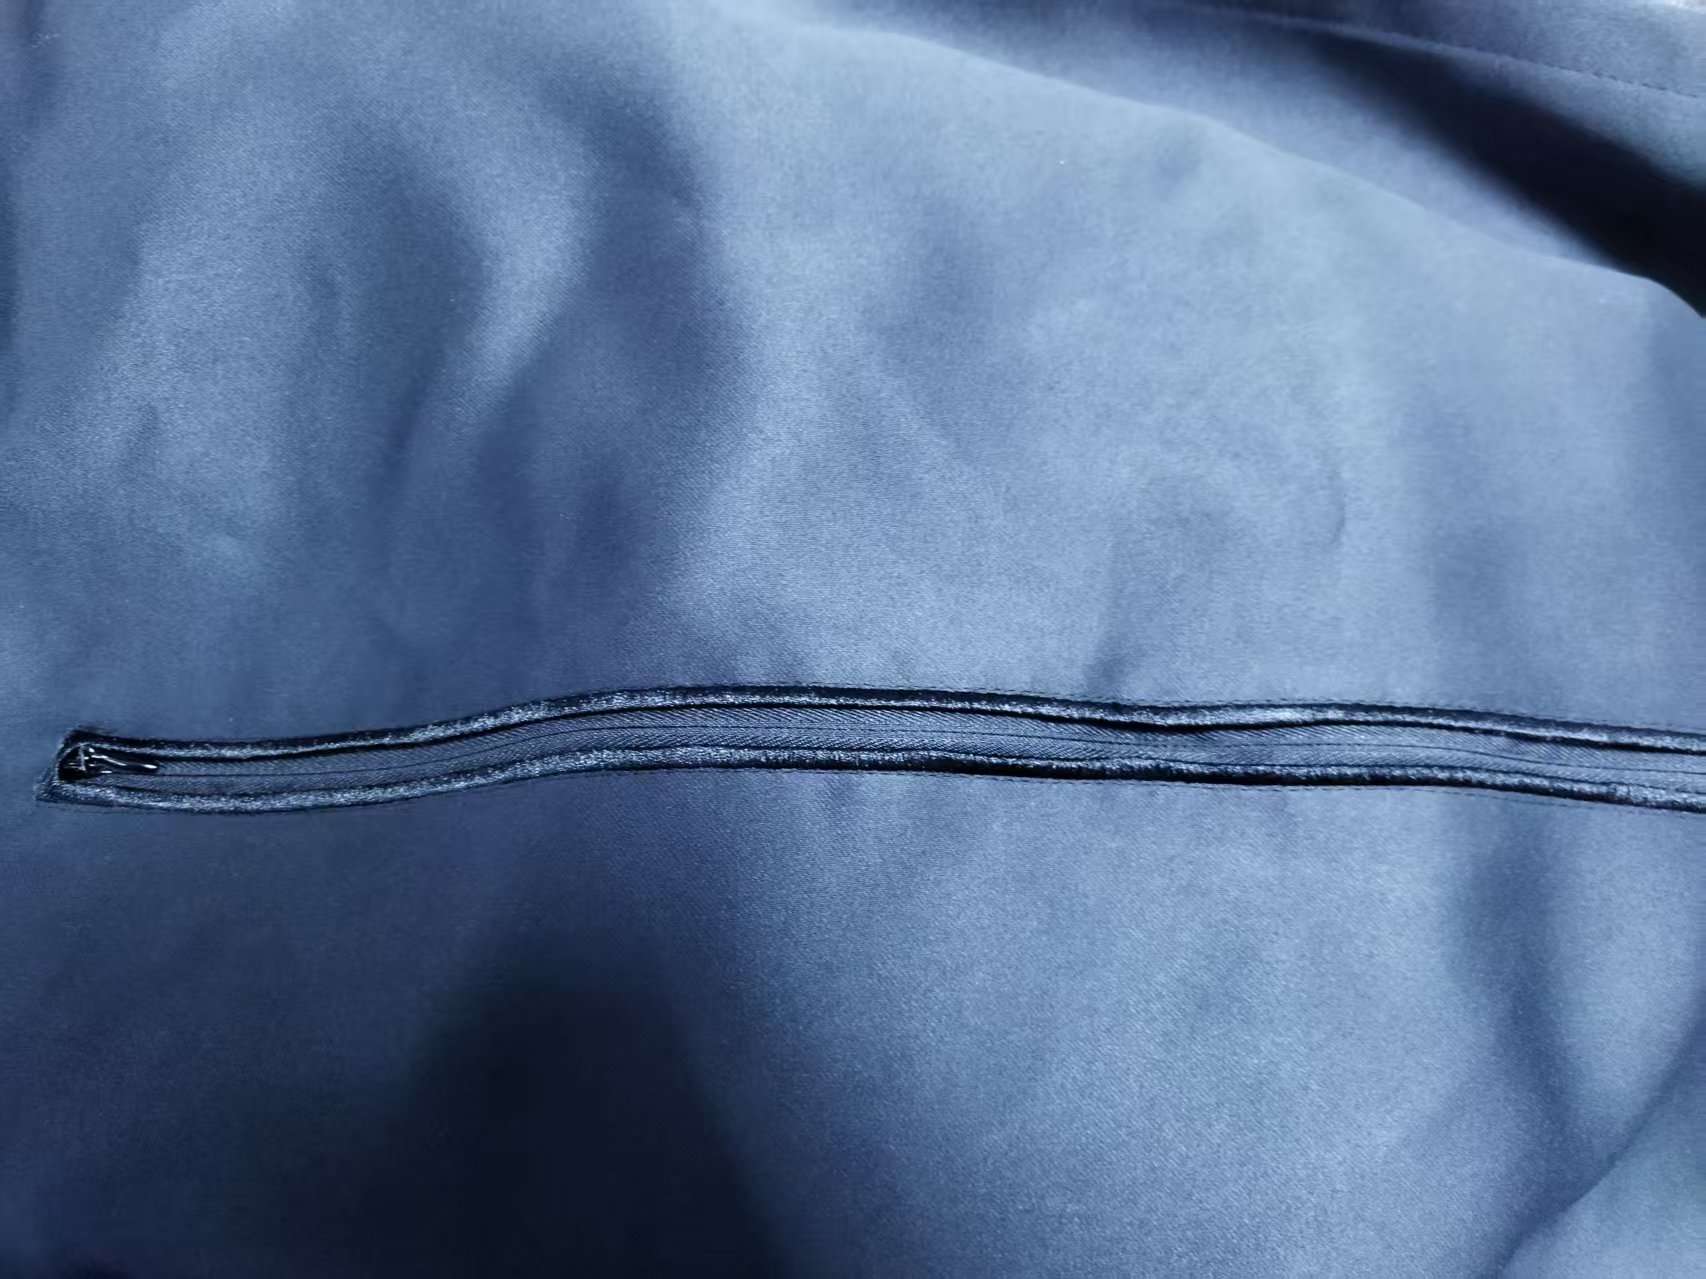
Edge reinforcement detail on a fabric panel — this is what prevents fraying and keeps the opening from losing shape over time.
Noise, Hygiene, and Reuse
Thin materials don’t block sound. Loose frames creak. DIY materials often degrade after repeated cleaning. And anything awkward to store or reuse eventually gets abandoned.
A lot of DIY builds fail here because people underestimate how much height variation and movement matter. What feels fine standing still often doesn’t work once things actually start moving.
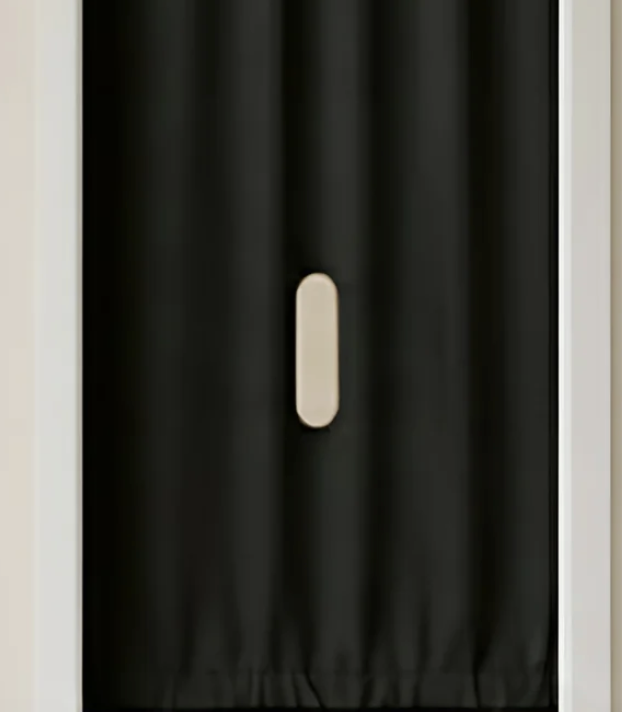
That’s why many designs use a larger oval opening instead of a small round cutout. An oval opening allows more vertical flexibility and works across a wider range of heights and positions. In our own designs, a 9 × 2 inch opening is used specifically to accommodate that variation without constant adjustment. This is definietely important for our door mount models, because doors have different heights, so the curtain has some margin to go up or down, which means our hole definitely needs some vertical flexibility. See the image below.
If the setup is only meant for one specific person and one fixed position, a smaller round opening can work, but it requires careful measuring and leaves very little margin for error. If the height is misjudged, fixing it usually means rebuilding the panel or structure entirely.
Sharp Edges and Reinforcement Problems
Openings need reinforcement. Without it, fabric tears and wooden panels chip.
Fabric tears if it isn’t reinforced.
Wood chips if edges aren’t rounded and sealed.
Even small imperfections get noticeable over time.
That’s why finished designs reinforce the opening itself. In our models, the edges are stitched and reinforced, so the opening keeps its shape, doesn’t fray, and stays comfortable over repeated use. It’s one of those details that doesn’t seem important until you’ve dealt with the alternative. We learned this the hard way during early prototyping — unreinforced fabric tears faster than you’d think.
Most people end up wanting the same thing
A setup that works, stores easily, and doesn’t feel like a temporary compromise. That’s exactly why purpose-built portable models exist.
Choosing One Setup for This Guide
For the purpose of this guide, we’re going to focus on one specific DIY approach: a portable standalone frame using a room divider.
This setup is:
- relatively easy to put together
- fully portable
- doesn’t require a door or wall
- doesn’t rely on pressure rods or tension hardware
Most importantly, it lets people start from something that already exists instead of building a structure from scratch. A folding room divider gives you a frame, stability, and separation without committing to permanent changes.
That makes it one of the most approachable DIY options.
Starting From a Room Divider
A look at how these fabric panels come together during production — basic frame construction with fabric attached.
Most room dividers are around 5 ft 9 in (175 cm) tall. That’s an important limitation to be aware of upfront.
For taller users, this means full anonymity isn’t guaranteed. Faces may be visible above the divider, and that’s simply a tradeoff of using an off-the-shelf divider instead of a custom-built frame.
Accepting the Tradeoffs
You’re trading maximum anonymity, custom height, and total rigidity for portability, ease of setup, no permanent damage, and minimal extra hardware.
For a lot of people, that’s a reasonable trade.
Step 1: Choosing the Right Room Divider
If you’re going to build a portable standalone glory hole setup, the first thing you actually need is the right room divider. This isn’t complicated, but picking one with the right characteristics makes the rest of the build way easier.
Portability Matters
- folds up easily
- doesn’t take up a permanent corner of your living space
- isn’t heavy like furniture you’ll never move again
Look for dividers that collapse or fold flat.
Multiple Panels = Flexibility
- better coverage
- more ways to position the opening
- more stability when wrapped around a frame
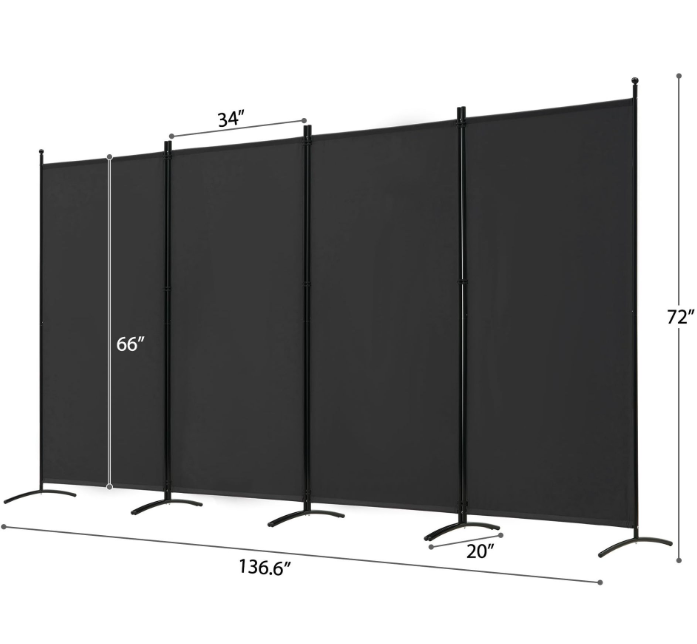
A four-panel setup with dimensions marked — wider coverage for more versatile placement.
Easy to Modify
Ideally, you want something where fabric can be cut or attached easily, panels are lightweight, and fixing or reinforcing doesn’t require power tools.
Clearance and Price
The bottom of the divider needs a little clearance so feet can pass under without awkward positioning. You also don’t need anything expensive — structure plus portability is the real goal. Thats it. Don’t let anyone tell you otherwise.
Step 2: Cutting the Opening (Oval Placement)
The opening should be oval, not round, and the important part is that it spans a height range, rather than sitting at one fixed point.
For a general-use setup that works for people of different heights, the oval should start and end within a vertical range of about 29.5 inches to 39.5 inches from the ground.
- the bottom of the oval is around 29.5 inches
- the top of the oval is around 39.5 inches
This gives roughly 10 inches of vertical tolerance, which is what makes the setup usable for people of different heights and slightly different stances.
Before cutting, stand the divider upright, mark the full oval outline, and double-check both the bottom and top positions. Once the fabric is cut, fixing mistakes usually means replacing that panel.
Step 3: Reinforcing the Oval
Once the oval is cut, reinforcement is not optional. This is where most DIY setups fail over time.
Fabric without reinforcement will stretch, fray, or tear. Even if it looks fine on day one, repeated tension and movement will slowly deform the opening until it feels sloppy or uncomfortable.
For fabric setups, the most reliable DIY approach is stitching around the oval. A tight stitch around the edge prevents fraying, helps the opening keep its shape, and spreads tension evenly.
Some people also add a thin layer of padding around the oval before stitching it closed. It’s not required, but it can soften the edge and improve comfort.
Most room dividers top out around 5 ft 9 in, and even with good placement and reinforcement, that height cap doesn’t change. Ours are designed to work comfortably for users up to 6 ft 3 in, with proper height, coverage, and reinforcement built in from the start. Some recommended versions can be found here on Amazon.
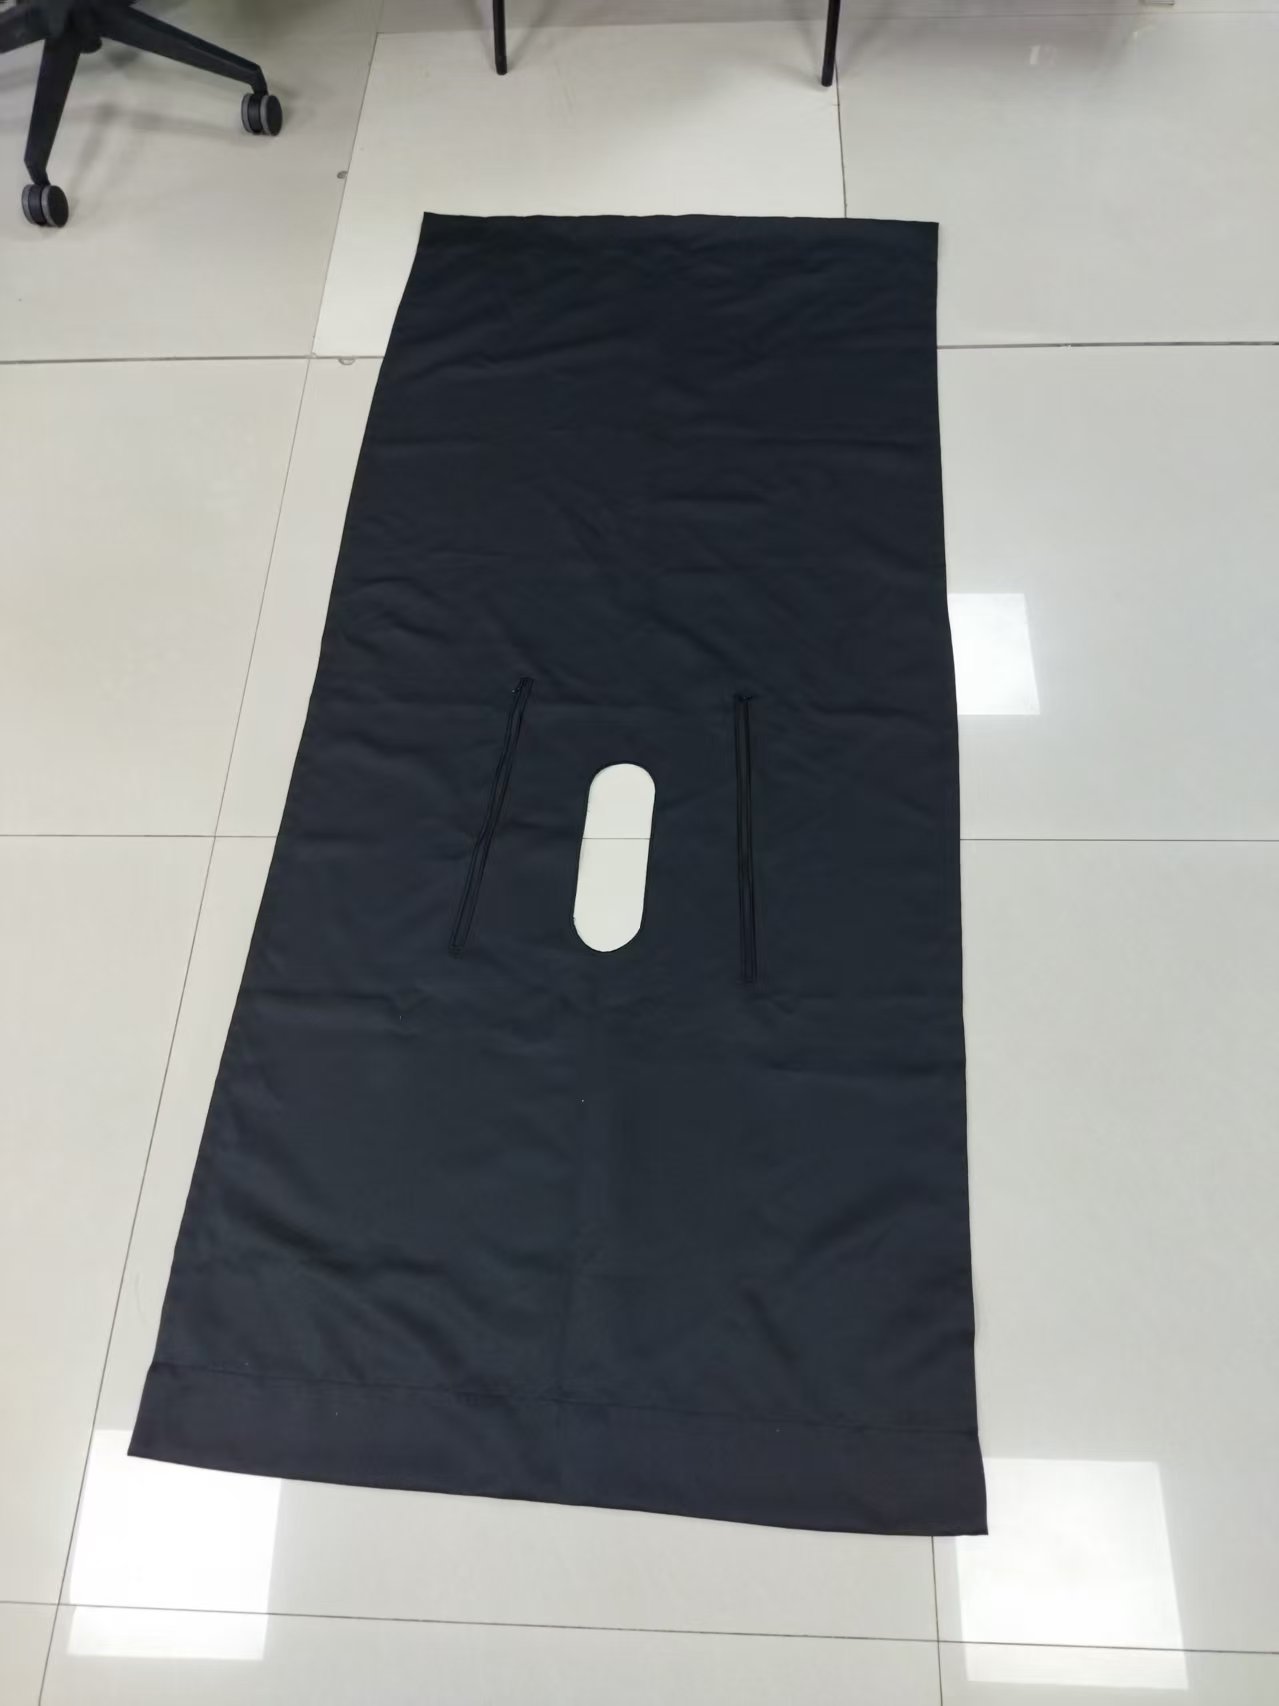
Hand Access: Why Zippers on Each Side of the Opening Matter
Ok so heres one detail that gets overlooked in basically every DIY guide out there: hand access. The opening itself is designed for one thing, but in practice, people want the option to reach through from either side — whether to guide things into position, hold the fabric steady, or just make the experience more interactive.
The simplest solution is adding short zippers on both sides of the oval opening. When closed, they keep the fabric taut and the setup looking clean. When open, they create small side slots just wide enough for a hand or forearm to pass through comfortably.
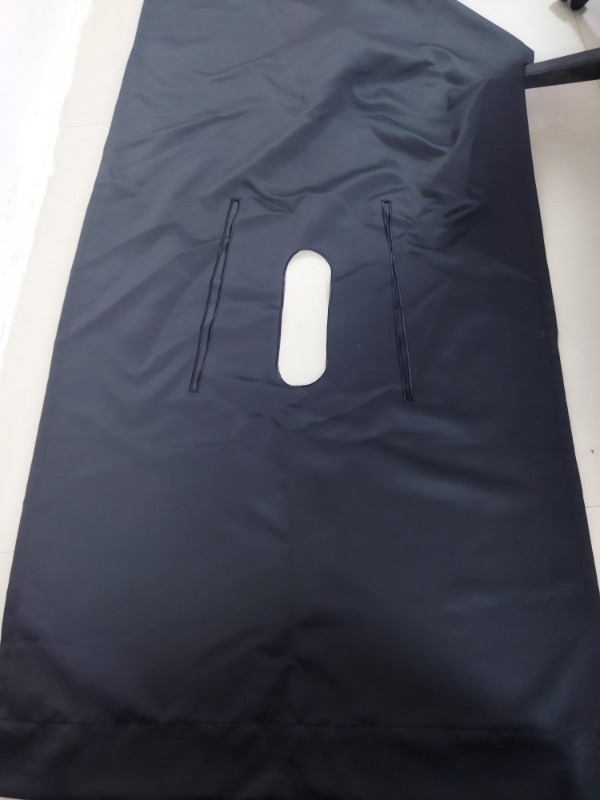
A fabric panel laid flat showing the zipper placement on each side of the central opening.
The zippers don’t need to be heavy-duty — seriously, don’t overthink this part. Standard garment zippers work fine — they just need to be sewn into the fabric cleanly so they don’t snag. Position them maybe 2–3 inches from the edge of the oval, running vertically for about 6–8 inches.
Honestly? This is one of those features you won’t find in most DIY tutorials, but anyone who’s actually used one of these setups will tell you it makes a noticeable difference. If you’re building from scratch, it’s worth adding from the start rather than trying to retrofit later.
Optional Privacy Cover: The Velcro Curtain Approach
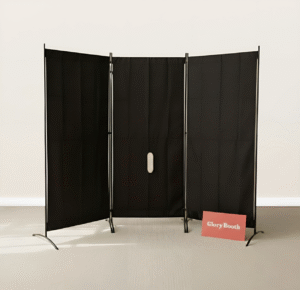
Look — not everyone wants the opening just.. sitting there visible when the setup isn’t in use — or even between rounds. A removable curtain that attaches with Velcro strips gives you a quick way to cover the oval without any permanent modification.
The idea is straightforward: attach a strip of adhesive-backed Velcro around the perimeter of the opening on the fabric side, then attach the matching strip to a small rectangular piece of fabric. When you press it into place, it covers the opening completely. Pull it off when you’re ready to use the setup.
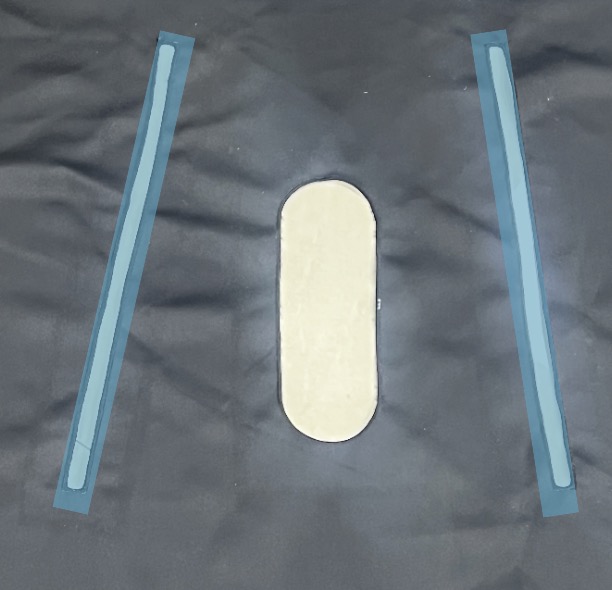
Velcro strips and a fabric cover piece laid out — when pressed over the opening, this gives you a clean, fully covered look.
This works especially well if you’re storing the setup in a shared space or just want a cleaner look when it’s folded up. The Velcro adds almost no bulk and the cover fabric can be the same material as the panel itself, so it blends right in.
Some people also use this approach to create a “blindfolded” effect during use — covering the opening from one side so neither person can see through. It’s a small addition that opens up a surprising number of options.
Prefer a wooden set up instead? Here’s how to make that happen.
1. Quick-Start Checklist
| Item | Purpose | Pro Tip |
|---|---|---|
| Portable panel or door (¾-inch plywood or hollow-core interior door) | Light yet sturdy base | Aim for 26 × 40 inches—that slips into most car trunks. |
| Hole saw or jigsaw (2 ¾–4 ¾ inches) | Cuts a smooth, round opening | 3 ¾ inches is the Goldilocks diameter for most users. |
| Fine-grit sandpaper | Removes splinters | Wrap it around a bottle for a perfect curve. |
| Silicone flange or grommet | Cushions and seals the edge | Fish-tank-grade silicone is body-safe and inexpensive. |
| Fold-out legs or clamp brackets | Makes the panel freestanding anywhere | Tripod microphone stands bolt on neatly. |
| Hinges or coat hooks | Easy carry and storage | Two hooks let you hang the panel in a closet. |
| Wipe-clean finish (marine varnish or PVC wrap) | Sanitizes quickly | Matte black hides scuffs; whiteboard vinyl lets guests sign it. |
2. Step-by-Step Build
- Mark the Center Line
Prop the panel upright and mark 40 inches up from the floor—adjust if your expected guests differ in height. - Cut the Portal
- Drill a pilot hole just inside your circle.
- Run the hole saw or jigsaw slowly, letting the blade work.
- Test first with a cardboard template to avoid regrets.
- Smooth and Soften
- Sand every edge until it feels like glass.
- Seat the silicone grommet with neutral-cure silicone and let it cure for 24 hours.
- Add Legs and Locks
- Screw on fold-out table legs or bolt two adjustable mic stands to the rear corners.
- For a doorway mount, install swing-away hinges so the panel folds flat when not in use.
- Finish for the Road
- Apply two coats of marine varnish (or wrap in adhesive PVC sheet) for a wipe-clean surface.
- Drill a small finger-pull near the top for easier carrying.
- Optional Upgrades
- Clip-on blackout curtain for anonymity.
- Battery LED strip for mood lighting.
- QR-code sticker linking to house rules—tech-savvy consent.
3. Hygiene and Consent Essentials
- Surface Prep: Wipe down with 70 percent isopropyl or antiviral spray before and after each session.
- Barrier Protection: Condoms, dental dams, nitrile gloves—mandatory for every participant.
- Safewords and Signals: Agree on a clear stop cue (knock pattern or verbal word) before anyone starts.
- After-Care: Warm towels, gentle soap, plenty of water, and reassurance.
5. Maintenance
- Inspect weekly for cracks, loose screws, or splintering.
- Reseat silicone if it starts peeling—hygiene first.
- Store the panel upright in a dry place; moisture ruins plywood and passion alike.
6. Prefer to Buy Ready-Made?
- Flat-pack gloryhole panels cost roughly $40–$220 online. (At least, the ones we recommend)
- Look for sealed edges, quick-release legs, and body-safe materials (silicone, ABS).
- Check reviews for build quality and discreet shipping.
Don’t want to build this from scratch?
A DIY project can work, but most people eventually want something cleaner, faster, and easier to store. That’s where a portable, purpose-built setup wins.
Final Word
A DIY Gloryhole To Go is a weekend DIY that delivers years of discreet adventure—provided you keep it clean, consensual, and within the law. Build responsibly, maintain diligently, and let the good times roll.
Final Thoughts on DIY Glory Hole Projects (From People Who’ve Actually Built Them)
Building a DIY glory hole can be an educational project, but it comes with real trade-offs.
Understanding those trade-offs helps people decide whether experimenting is worth it or whether a ready-made solution better fits their lifestyle.
Knowing both paths allows for deliberate choice rather than trial and error.
Frequently Asked Questions About how to make a gloryhole
Can you learn how to make a gloryhole at home
Yes, but it requires careful planning, proper materials, and attention to safety and discretion.
What is the biggest risk with a DIY glory hole
Permanent damage, instability, and safety issues are the most common risks.
Are DIY glory holes renter friendly
Most are not, especially those involving wall or door modifications.
Why do people switch from DIY to portable options
Portability, discretion, and ease of storage are the main reasons.
Is a portable glory hole safer than DIY
Purpose-built portable options are generally safer because they are designed and tested for the specific use.
Can a glory hole setup be stored discreetly
Portable solutions are easier to fold away, store, and bring back out without leaving a permanent trace.